My daughter recently moved into a new place, and for the first time has been quite inspired to decorate and personalize it. To help out, I dug through the basement and offered her some Craigslisted treasures that she could use her creative powers to transform and beautify. Unfortunately, I do not have “before pictures” but trust me, they were aesthetically doomed! (What am I doing with a basement full of random Craigslisted furniture? Don’t ask!)
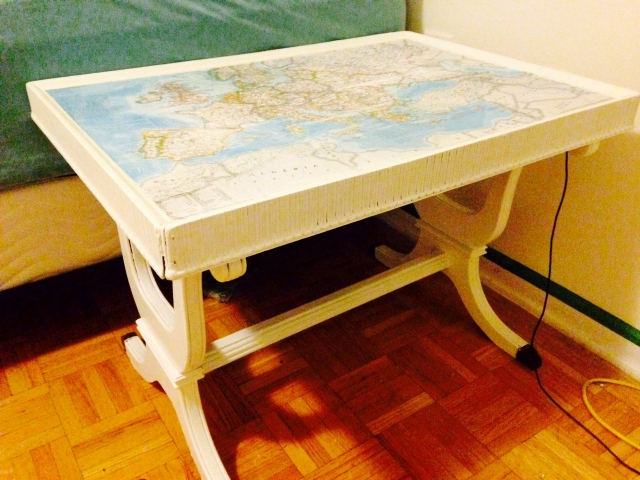
 This little side table, above, was many decades-old, scratched-up, dowdy brown wood veneer. It did, however, have nice details and trim.
Since her new room is on the small side, and since she wants to paint her walls a colour (either grey or mauve), she settled on white paint.
For a successful paint job on old furniture:
1. First wash thoroughly with TSP to increase adhesion. Rinse. Sand with approximately 100 grit sandpaper. Wipe to remove grit from sanding. Using painter’s tape, tape off brass hardware feet in this case, or any parts that should not have paint on them.
2. Then, paint with an adhesive primer such as Benjamin Moore Fresh Start primer. We are never without a pail of this product in the house! (Note, I really am not paid by Benjamin Moore; I just suggest the products I know and trust!) I recommend turning furniture upside down and starting with the hard-to-reach areas for all coats of paint. That way, when you turn over the piece, you will smooth out any paint that is runny or drippy and the visible areas will get the last look. Let dry according to primer instructions.
3. Then, sand again lightly to smooth and remove any bumps. After this, we used a special paint intended for harder-wearing areas such as cabinetry. Urethane Acrylic “Cabinet Coat” is a Benjamin Moore owned line of paints which replaces oil-based paints which were formerly used for cabinetry and furniture but are now banned in Canada for health and environmental reasons. For more information check here.
4. For best results, let dry according to product instructions then repeat the previous sanding and painting, always starting under the piece and finishing on top. For furniture with drawers, only paint the sides of the drawers, which aren’t visible when the drawers are shut, with one coat of primer or paint. This prevents the drawers from getting sticky and difficult to open.
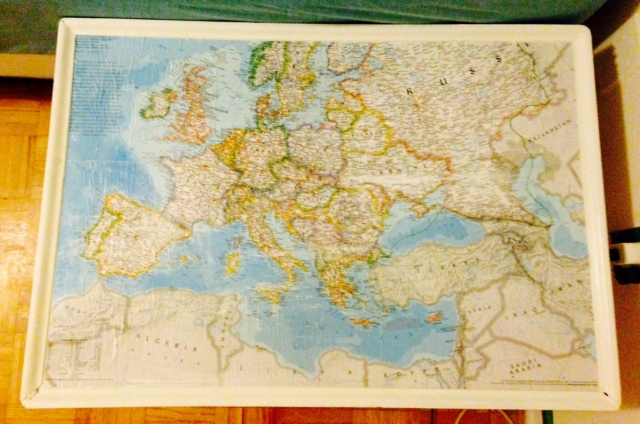
6. My daughter liked the recessed surface of the small table and it inspired her to personalize the piece further by adding a map of places she’d like to do more traveling. National Geographic is a good resource for this sort of thing. Apply a map like this with adhesive spray. available from craft stores. Before spraying, tape off the painted areas that will not be covered by the map, using low-adhesive painter’s tape so that the spray does not ruin the finish of the adjacent paint.
7. Let dry, remove painter’s tape and finally, apply several coats of clear resin over the map to protect it from the inevitable effects of coffee mugs, keychains and so on. Voila!
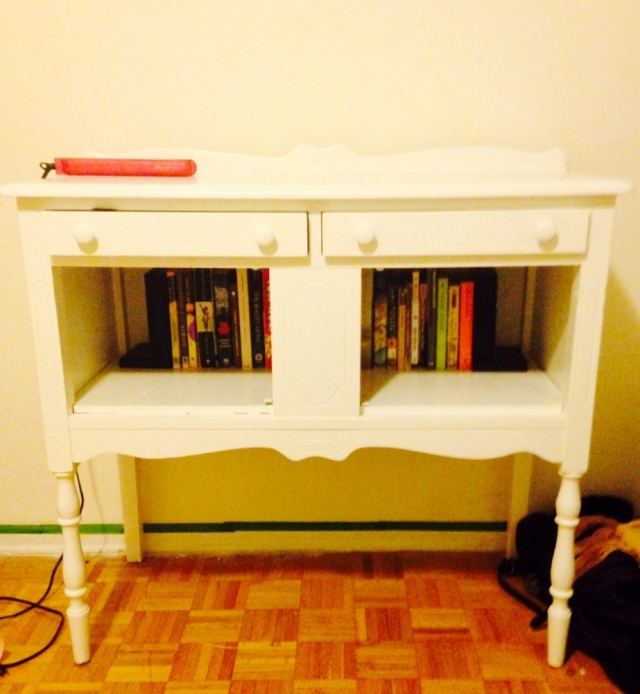
This sweet little sideboard had a multitude of colours on it, reminiscent of the 80s (cream with forest green and red). It had lost its cupboard doors long before I met it. Staying inspired by the eternal words of a legendary decor guru:
the same paint techniques were applied to this piece. Daughter dear intends to find baskets to put inside the door openings for a chic, modern look, but in the meantime it is a handy home for a voracious reader’s ever-expanding collection of books.
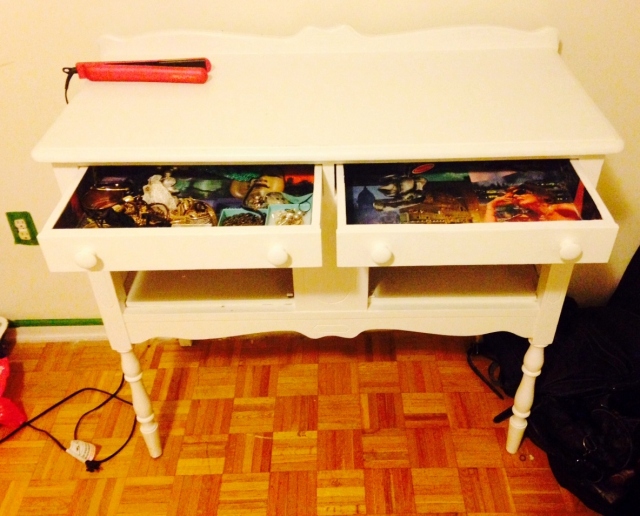
Expanding upon the European travel theme, she then clipped photos and created a collage inside of each of the small drawers on this unit.
The collage is finished by using a couple of coats of a water-based, non-yellowing sealer like the one at step 7 in this post.
So, for anyone moving into a new home, student housing or otherwise trying to live elegantly and make ends meet at the same time, cast-off furniture can be beautifully transformed to create a look of chic comfort. I am looking forward to seeing the finished room!
These pieces are nice enough to last for many years of enjoyment and could move to a cottage one day when your ship comes in!
Follow me by clicking on the follow button in the right margin, and on Twitter @patinaandcompan


What excellent ideas and resourcefulness. Congrats and thank you for sharing.
Thanks! She was pretty creative, wasn’t she?
For sure.
Great idea!
Wow! I loved the way those pieces turned out and your instructions are very helpful.
Thank you!
I love the side table idea with the map! Great idea.
My wise old grandmother taught me about optimism and white paint many decades ago……….LOL
What a creative idea to use the map! My children now have many of the pieces of furniture that my husband and I had when we first got married. It’s fun to visit them and see the items re-purposed by the next generation.
I love that map table! It has a lot of charm. Thanks for all the pointers. I didn’t know any of this. I’ve painted a time or too without really knowing what I was doing. This all makes great sense. Thanks for sharing her new pieces. Well done all around.
PS Drawer collages inspired!
I so love the drawer treatment, what a great idea.
Nice post .
Love the “optimism and white paint” quote too! 🙂